
You need to configure BARR/SPOOL before you use it for the first time. Thereafter, you can change the configuration settings as your operational needs change. Configuration steps include setting options in the Barr software and in the Windows 2000 or Windows XP operating system.
Use the following steps to set up BARR/SPOOL with the minimum required features for printing a test file.
Before you can configure or operate BARR/SPOOL, you must be logged on as the system administrator to have full user access rights, or the system administrator must grant you the corresponding user access rights. Also determine which network users will be permitted access to various BARR/SPOOL features. You will use this information when you set up user access rights.
Compile a list of user names and corresponding domains.
Determine the type of tasks each user needs to perform. For example, can a specified user only view the list of spool files, or can they delete spool documents, disable spool printers, and change configuration information? Some tasks require additional rights. For example, to configure BARR/RJE you must be a member of the local Administrators group.
Organize users who will perform the same tasks into local or domain groups. Create the groups and assign users to them. You can now assign the appropriate user rights.
When you open the Spool Window the BARR SpoolCore service starts, if it is not already started. When the BARR SpoolCore service is started, BARR/SPOOL can receive and route spool documents.
 To
add a Windows printer, you must be a member of the Administrators
group. If you are using Windows 2000 you can also be a member of the Printer Operators or Server
Operators group or a Power User
on a workstation.
To
add a Windows printer, you must be a member of the Administrators
group. If you are using Windows 2000 you can also be a member of the Printer Operators or Server
Operators group or a Power User
on a workstation.
If you already have printers defined on your computer, you can skip this step. If your computer is not already set up to print, you need to define a local or network printer. Identify the devices you will use as sources and destinations for spool documents. You will use this information when you set up Windows and BARR/SPOOL printers.
What programs and computers will you use to send files to the spool?
When sending files from the spool, what physical devices or printers will you route them to?
Once you have determined your source and destination devices, see the Getting started with printers topic for more information.
Use the Configuration Utility to enable the spool Retain feature, so you can use the test file more than once.
After you run the setup program, you can print a Barr-supplied test file. You can also use Print Utility to send an ASCII test file to the spool. Select how you want to send the file to the spool and complete the following steps.
These steps tell you how to print the Simple Printer Test included in the print document named SIMPLE. This test assumes you have successfully defined a spool printer that works for 3211-type mainframe printers and desktop laser printers. For desktop laser printers, this test prints in portrait mode, so the printout is truncated to 80-character lines.
Before you print the SIMPLE test file, set up the retain feature
or copy the file so you can print it again later if you have not already
done so.
To print the file, complete the following steps to match the attributes of the printer and the document.
Set the spool printer Class to A by double-clicking the printer’s Class column and typing A.
Set the spool printer to Ready by right-clicking the printer row and selecting Ready.
Set the SIMPLE file’s state to Ready by right-clicking the document row and selecting Ready. The SIMPLE document will print to the selected printer and the file will be retained in the specified folder.
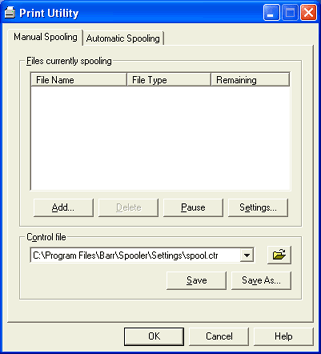
Print Utility sends files to the spool. It converts files to the internal BARR/SPOOL format and adds document attributes that you select.
To test this feature, create a simple ASCII file using the
Windows Notepad accessory.
Complete the following steps to send an ASCII text file to the spool.
Open the Spool Window.
On the menu bar, select Tools | Print Utility.
Select the Manual
Spooling tab, and then click Add.

Navigate to the folder that contains the ASCII file, select the file, and click Open.
From the Format tab, select Standard ASCII, and then click OK. The selected file briefly displays in the Manual Spooling tab’s Files currently spooling list. It disappears quickly, so you might not see it display.
Click OK. The spooled document displays in the Spool Window’s document list.
To print the document, set the document and printer criteria to match, and change their states to Ready.