Step 1 - Remote Spool Window (RSW) Setup requires that BHCS version 7.2.2.34 or later is installed and running on your BHCS Server.
Download the latest version of the Remote Spool Window (RSW):
Go to www.barrcentral.com
From the side menu choose Downloads
Choose the Other Software and Utilities link
Scroll down to Remote Spool Window software (Description: Remote Spool Window for BHCS version 7.2.x.x or later), then click Download.
Locate the RSW_Download_1.2.x.x.zip file and open the version folder.
Install the Software
Double-click the Setup.exe program and choose Run.
From the RSW Setup Wizard dialog, click Next.
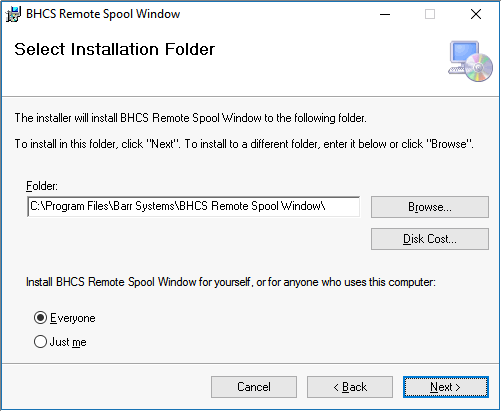
Select Installation Folder options
Install to the default folder location or click Browse to change folder location.
Click Disk Cost... to view disk space availability.
Install Remote Spool Window for a single user or for everyone.
When finished, click Next.
To confirm the installation, click Next.
 A User Account Control
(UAC) dialog should appear requesting
authorization to make changes to this computer, click Yes.
A User Account Control
(UAC) dialog should appear requesting
authorization to make changes to this computer, click Yes.
The Installing BHCS Remote Spool Window dialog will show a progress bar during the installation.
Please be patient, the installation may take a few minutes.
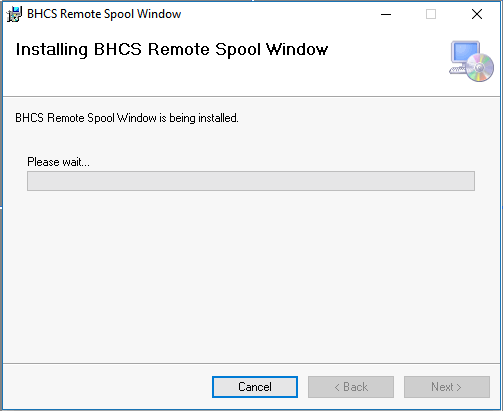
Once the Installation is complete, click Close.

Step 2 - Connecting the Remote Spool Window (RSW) to a BHCS server
Go to Start | All Apps | Barr Systems | Remote Spool Window or use the Remote Spool Window shortcut on your desktop.
 Initially opening
the RSW application will bring
up a Select BHCS Server dialog.
Clicking on Search for BHCS Servers
will return any BHCS installs
located on the local network.
Initially opening
the RSW application will bring
up a Select BHCS Server dialog.
Clicking on Search for BHCS Servers
will return any BHCS installs
located on the local network.
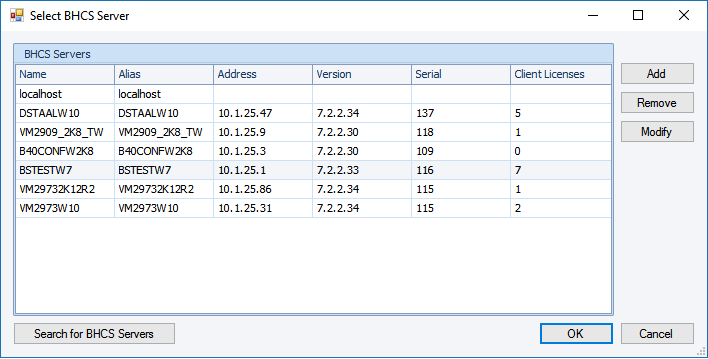
Perform the following steps, where applicable.
Select a BHCS Server and click OK.
Add: To define a new server, click Add.
Enter the new Host name. Enter either a computer name or IP Address.
Enter the new Alias or description.
Remove: Select a server and click Remove.
A Delete host entry dialog will appear, click Yes.
Modify: To modify an existing server, click Modify.
Make the appropriate changes to Host name and/or Alias or description, then click OK.