Use Retain Window to automatically save or retain copies of printed or deleted spool documents. If you need to print a retained document, you can restore it from the Retain Window to the Spool Window. You can access this window from the Spool Window, by selecting Document | View Retain on the menu bar.
Click the portion of the window you want to learn more about.
The menu bar displays below the title bar. Click the following menus to learn about the available commands.
Print Spool Listing– Prints a listing of the documents in the Retain folder. This command presents a Print dialog box, where you can specify the number of copies, the destination printer, and other printer setup options.
Print Preview– Shows what the retain listing printout will look like. Use the print preview toolbar options to view either one or two pages at a time, move through the document, zoom in and out of pages, and initiate a print job.
Print Setup– Selects a printer and a printer connection. This command displays a Print Setup dialog box, where you specify the printer and its connection.
Exit– Closes the Retain Window. BARR/SPOOL prompts you to save setting files with unsaved changes.
View
AFP –Displays the selected spool document in either the BARR/TRANSFORM (ADEPT Suite) or BARR/TRANSFORM (DocBridge) Viewer depending on the software installed.
Text –Displays the selected spool document in the Text Viewer.
Send To –Sends the selected document to a program of your choice. Destination programs are stored in \\Program Files\Barr\Spooler\SendTo. You can set up a maximum of 20 destination programs to display in the Send To list. You must be granted the Document - View user access right to use this option.
 Files sent from the spool to other programs
are read-only. If you want to modify and save a file, use the program's
Save As option.
Files sent from the spool to other programs
are read-only. If you want to modify and save a file, use the program's
Save As option.
Properties –Displays the header fields and other properties for the selected document.
Delete– Deletes the selected retain documents.
Ready– Sets the state of the selected retain documents to Ready.
Hold– Sets the state of the selected retain documents to Hold.
Restore– Restores the selected documents to the spool queue.
Delete After Printing– Sets the document disposition to Delete. Deletes the selected documents from the disk after printing from the Spool Window. To display a document's current disposition, add the Disposition column to the Retain Window. You must enable the retain feature to use this command.
Retain After Printing– Sets the document disposition to Retain. Copies the selected documents to the retain folder after printing from the Spool Window. To display a document's current disposition, add the Disposition column to the Retain Window. You must enable the retain feature to use this command.
Schedule– Schedules the selected documents to print at a specific date and time.
Remove Scheduling– Removes the schedule from the selected document. This option will not be available if the document does not have a schedule.
Tools
Add to Diagnostics– Adds the selected documents in the diagnostics file the next time the Diagnostics Utility is used. A list of the documents that will be included can be viewed from \\Temp\CustomDiag.txt. When the Diagnostics Utility is used, all of the documents listed in this file will be included, assuming they still reside in the directory specified. The Diagnostics Utility must be run on the same computer where the files reside.
Delete Index Files– Deletes the index files associated with the selected documents. Index files contain offset values for document settings such as page breaks. Index files are created when documents are viewed or printed. Documents are indexed to make navigation in the Viewer quicker and easier, as well as decrease print processing time.
Find– Searches all entries in the document list for the specified text.
Confirm Delete –Allows the user to enable or disable the delete confirmation message from the Retain Window. A check appears next to this menu item when the option is enabled.
Custom Filter –Specifies a column and value on which the view will be filtered. Opens the Custom Filter dialog box.
Clear Custom View –Clears the display for the viewing sort order and removes all filters.
Information on Status –Displays a Help topic with a description of each document state. If the document is in an error state, a message will display with the error and an error description.
Clear Settings– Resets the display columns to the default settings. You can open an existing configuration file with the Open Settings command.
Open Settings– Opens an existing configuration file. You can switch between the most recent settings files with the 1, 2, 3, 4 command. To create a new file, use the Save Settings As command.
Save Settings– Saves the active configuration file to its current name and folder. When you save a configuration file for the first time, BARR/SPOOL displays the File Save As dialog box so you can name your file.
Save Settings As– Saves the active settings and assigns a file name. BARR/SPOOL displays the Save As dialog box so you can name your file.
Revert Settings– Abandons your unsaved changes and reverts to the saved settings for the configuration file.
Format Columns– Displays the Format Columns dialog box for choosing which attribute columns to display in the Retain Window.
1, 2, 3, 4– Opens the last four files you closed. Choose the number that corresponds to the file you want to open.
Toolbar– Displays or hides the standard toolbar, which includes buttons for some of the most common menu commands. A check mark appears next to the menu item when the toolbar is displayed.
Contents and Index– Displays the Retain Window Help window. The Help window incorporates contents, index, search, favorites, and glossary tabs to make it easy for you to find answers to your questions. For more information on using Help features, see the Using the Help topic.
Barr Systems on the Web– Opens the Help with links to the Barr Systems Web page.
About Retain Window –Displays program information, version number, and copyright.

The toolbar provides quick access to commands. To hide or display the toolbar, on the menu bar, select View | Toolbar. To move the toolbar, click the toolbar and drag it to a new location.

Restore Document – Restore the selected document to the spool queue.
View – Displays the selected document.
Properties – Displays the selected document’s properties.
Delete – Sets the selected document’s state to Delete.
Ready – Sets the selected document’s state to Ready.
Hold – Sets the selected document’s state to Hold.
Ready Mode – Changes the mouse pointer, enabling you to set jobs to the Ready state with a single click of the mouse. The button appears pressed in when the Ready function is active. To return the pointer to normal mode, click the Ready button again.
Hold Mode – Changes the mouse pointer, enabling you to set jobs to Hold with a single click of the mouse. The button appears pressed in when the Hold function is active. To return the pointer to normal mode, click the Hold button again.
Clear Custom View – Clears the display for the viewing sort order and removes all filters.
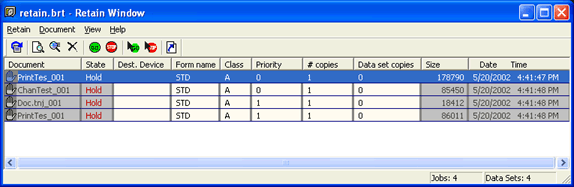
Document attributes display in the Retain Window columns. Attributes include the document name, state, class, and size. You can customize the column display with the View menus Format Columns command, if you have the appropriate user access rights.
The Document list displays the retained documents that you can restore or delete. If you change the document viewing order, a yellow box with a number and arrow will appear in the column heading to indicate the sort order and if the documents are being displayed in ascending or descending order.
To select all of the data sets within a job,
press SHIFT and right-click one of the data sets. Data sets that have
been filtered
from the view will not be selected.
When you right-click in the Document list, the following options display.
View (The submenu options that display vary depending your software licensing.)
AFP – Displays the selected spool document in either the BARR/TRANSFORM (ADEPT Suite) or BARR/TRANSFORM (DocBridge) Viewer depending on the software installed.
Text – Displays the text of the selected document with the Viewer utility.
Send To – Sends the selected document to a program of your choice. Destination programs are stored in \\Program Files\Barr\Spooler\SendTo. You can set up a maximum of 20 destination programs to display in the Send To list. Files sent from the spool to other programs are read-only. If you want to modify and save a file, use the program's Save As option. You must be granted the Document - View user access right to use this option.
Properties – Displays the header fields and other properties for the selected document.
Delete – Deletes the selected retained document.
Ready – Sets the state of the selected document to Ready.
Hold – Sets the state of the selected document to Hold.
Restore – Restores the selected documents to the spool queue.
Delete After Printing – Sets the document disposition to Delete. Deletes the selected documents from the disk after printing from the Spool Window. To display a document's current disposition, add the Disposition (BARR_DISPOSITION) column to the Retain Window. You must enable the retain feature to use this command.
Retain After Printing – Sets the document disposition to Retain. Copies the selected documents to the retain folder after printing from the Spool Window. To display a document's current disposition, add the Disposition column to the Retain Window. You must enable the retain feature to use this command.
Schedule – Schedules the selected document to print at a specific date and time.
Remove Scheduling – Removes the schedule for the selected document. This option will not be available if the document does not have a schedule.
Options
Add to Diagnostics – Adds the selected documents in the diagnostics file the next time the Diagnostics Utility is used. A list of the documents that will be included can be viewed from \\Temp\CustomDiag.txt. When the Diagnostics Utility is used, all of the documents listed in this file will be included, assuming they still reside in the directory specified. The Diagnostics Utility must be run on the same computer where the files reside.
Confirm Delete – Enables or disables the delete confirmation message from the Retain Window. A check appears next to this item when the option is enabled.
Custom Filter – Specifies a column and value on which the view will be filtered. Opens the Custom Filter dialog box.
Filter on Value – Filters the view for the selected column and value.
Clear Custom View – Clears the display for the viewing sort order and removes all filters.
Information on Status – Displays a Help topic with a description of each document state. If the document is in an error state, a message will display with the error and an error description.
The following are the possible document states.
Hold – The document cannot be routed to a printer.
Hold Reprint – The document contains a reprint range. The document will not print until right-click the document and select Ready and set the routing criteria to match that of a spool printer.
Hold Error ... – The document state changed to Hold because an error occurred. Right-click the document and select Information on Status to display the document error and an error description.
Ready – The document is ready to be routed. The document will begin printing when its routing criteria matches that of a spool printer and it is the next document in the queue.
Ready Reprint – The document contains a reprint range. The document will begin printing when its routing criteria matches that of a spool printer and it is the next document in the queue.
Ready @ ... – The document has been scheduled to print at a specific time. You can resize the column to view the scheduled print date and time.
Ready @ ... Reprint – The document has been scheduled to reprint at a specific time. You can resize the column to view the scheduled reprint date and time.
Viewing – The document is currently being viewed.
Deleting – The document is being deleted.
SysIn Dsn – The document is part of a multiple data set SYSIN job. Because the state is controlled by the first data set, this will appear as the state for the second and all successive data sets.

The left end of the status bar describes menu item actions as you use the arrow keys to navigate through menus. It also describes actions when you pause the mouse pointer over a menu item or toolbar button. The right area of the status bar displays the following information.
Filtered – Indicates the view is currently being filtered. Click the Clear Custom View toolbar button to restore the view.
Jobs – The number of jobs currently in the document list.
Data Sets – The number of data sets currently in the document list. Each job can contain one or more data sets.